Using OfficeScheduler.Net is easy.
|
1. Set up your resource types. Every person or object that you need to schedule for your company is called a "resource." To help you categorize your resources, and prevent them from all bunching up on one page, you specify resource types. For example, some of your human resources (users) may be Office Staff, others may be Field Sales Personnel, and some non-human resource types might include conference rooms or shared office equipment. 2. Set up your people and resources. Every resource receives a username and password. Users can log in and view and/or modify their own schedule or every schedule, depending on the access level you assign. 3. Set up your event type options. Every event in the system has an event type. Examples of event types would include pending appointment, finalized appointment, unavailable, on vacation, do not disturb, out for repair, and other appropriate event types for the people and things your company needs to schedule. |
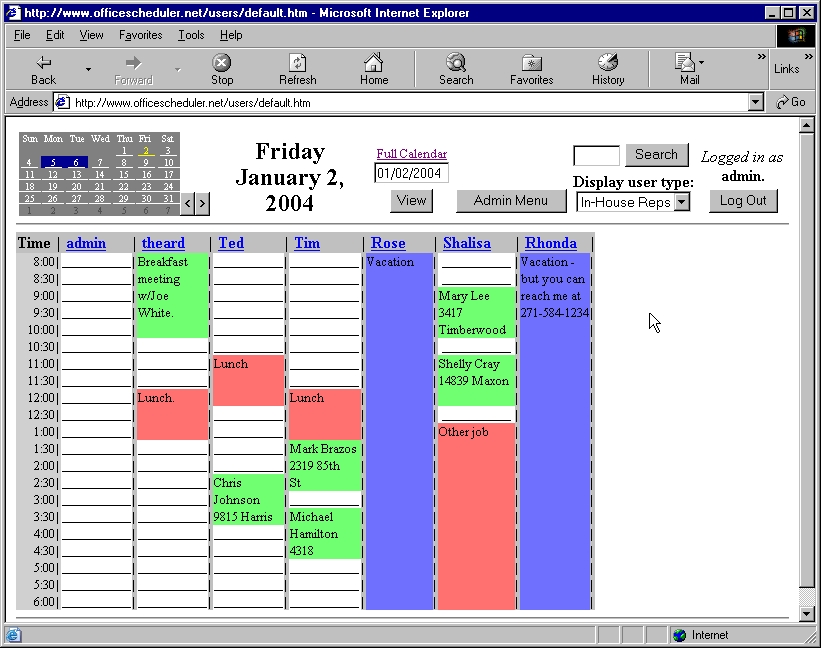
4. Start scheduling! When you log in, you see today's schedule board. Resources are listed across the top as collumn headings, and times of day are listed in rows as row headings. If you wanted to schedule an appointment for John Doe today at 3:00pm, you would simply click on the John Doe collumn in the 3:00pm row, and the event editor would appear. Then you would type in a description for the appointment, specify the duration of the event, select the appropriate event type (such as "pending appointment"), and click Save. John Doe would then be notified (assuming he has specified a notification address) and could log on (from anywhere in the world with internet access) and change the "pending appointment" to a "finalized appointment." Checking back later, you could see that the event type had changed to finalized and know the appointment was firm.
|
A sample schedule board: